14.10.2017
![]()
This article is the perfect addition for the Long Exposure Guide. When you use long exposure times you will notice some colorful pixels in the 100 % view of your photo. What this confetti is, how it originate and how you can remove it, will be explained in this article.
What is a hot pixel?
Hot pixels are overheated pixels on the camera sensor which is caused due a long exposure. The temperature of the environment is a factor, as the modernity of the sensor. If you long expose on hot days hot pixels will be appear much earlier than on cold days. And you longer expose you will have more hot pixels in the final image.
And there are also dead pixels. These pixels are permanently black or perform a wrong color rendering. All this sounds terrible, but don’t panic! Modern camera sensors have over millions of pixels, so if there are some faulty ones, you won’t see them, because there are too much working correct pixels.
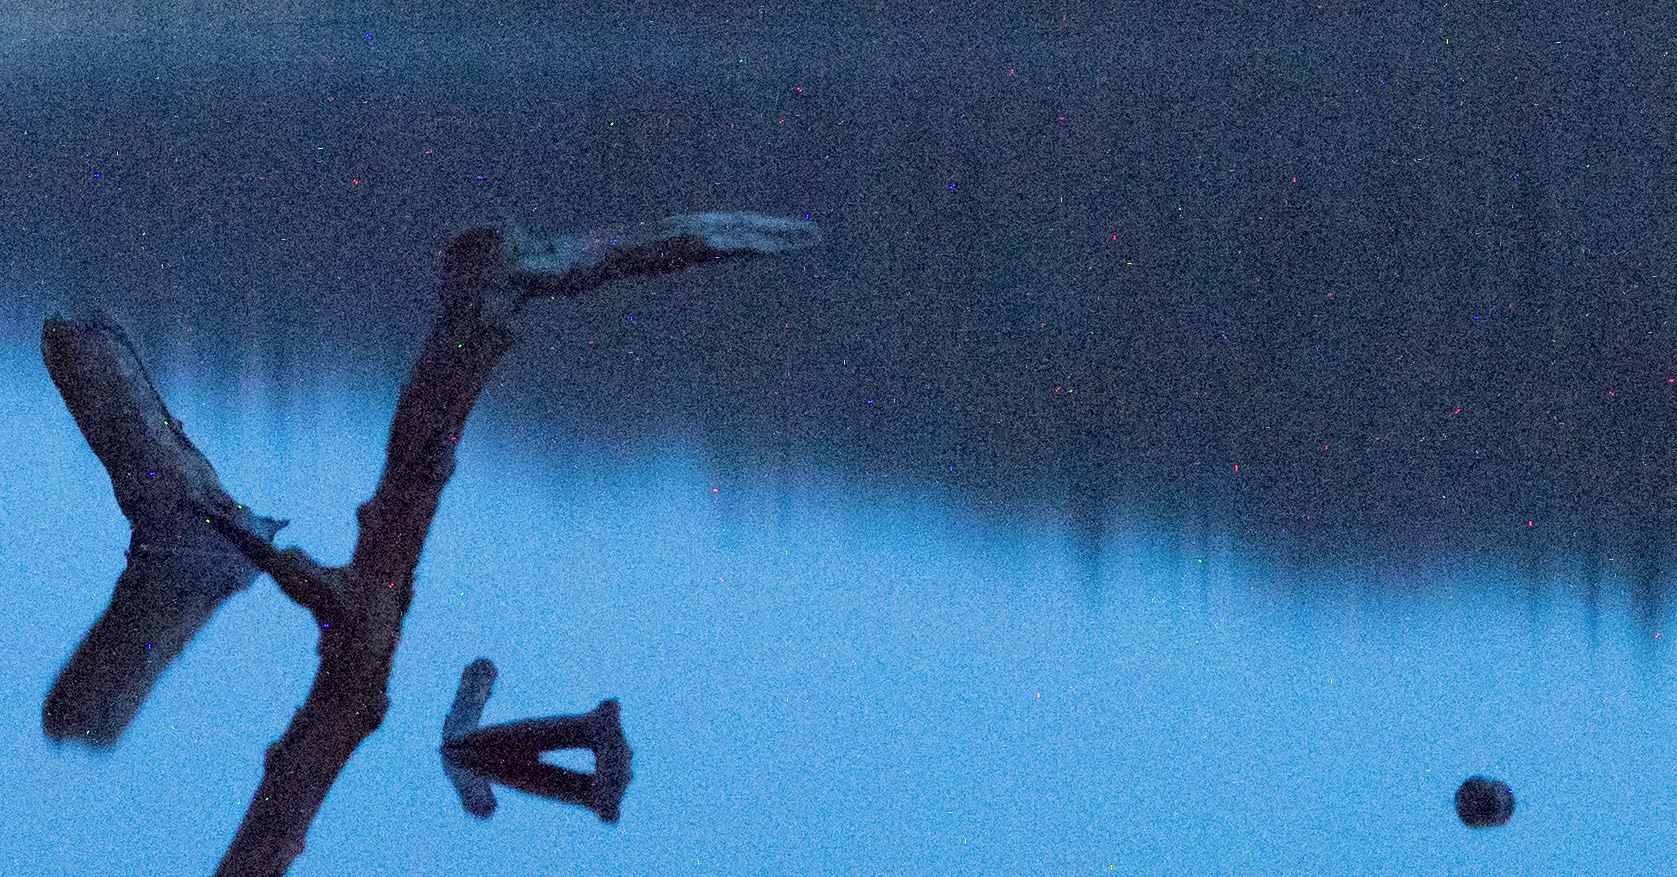
Our example picture is this:
![]()
The data: 308 seconds, f/8, ISO 1600, no edits
How to remove this mess?
Of course, there are several plugins for Adobe Photoshop, but you have to pay extra money and with some of them you have to make compromises. Like no support for 16 Bit files or they remove too much little details of the picture.
Photoshop offers a reliable filter to remove hot pixels. It is the “Dust & Scratches” filter in the “Noise” category which allows you to remove the main part of the unwanted colorful pixels.
We loaded the picture in photoshop. Then we activate the filter and we have the filter settings in front of us.
This picture shows a 100 % view of the photo.
The best settings for don’t lose details are between 2 to 4 pixels at the radius settings and the threshold should be between 50 to 90. The threshold decides how much detail you want to reduce. If you decrease it more and more you will lose a lot of details and the image is going to lose it’s sharpness. But of course you should find the best settings for you, and don’t forget to check the preview checkbox.


After you found the correct settings for you, click ok and the hot pixels will be removed. Our example picture looks now like this after the apply of the filter:

So Photoshop offers a really easy and reliable solution to get rid of the hot pixels. I’m using it always for my long exposures and I’m satisfied with the results. Unfortunately there is no appropriate alternative to remove them in Lightroom. So you have to import the photos from Lightroom to Photoshop and after editing you reimport them back to Lightroom. Anyway, this is one of the quickest ways to clean your photos from the confetti.
For all who don't want to read, here is the video with the same instructions:
Report
My comments