13.05.2018

This article is not about any color gamut or color profiles. This article just covers only the practical effects of an 8-bit and 16-bit workflow. An 8-bit photo file has a total color depth of 24, since 8 bits are provided for the primary colors red, green and blue (3*8). These amount of colors are much more what the human eye, or better said brain, can differ. But if you start to edit a file with 8 bit color depth the colors and tones start to get stretched and crushed, what leads to banding.
This visible tonal gradation is avoidable with 16 bit. With 16 bit there are 16 bit for the primary colors, so a picture could have a color depth of 48 bit (3*16). Could be because cameras record 12-16 bits per color channel. The Nikon D750 and D850 taking raw pictures with 14 bit. These two camera models are able to capture 16.384 shades of red, 16.384 shades of green and 16.384 of blue (2^14). If we multiply this we arrive at 4.398.046.511.104 (over 4 trillion) possible colors instead of 16.8 million colors with an 8 bit file.
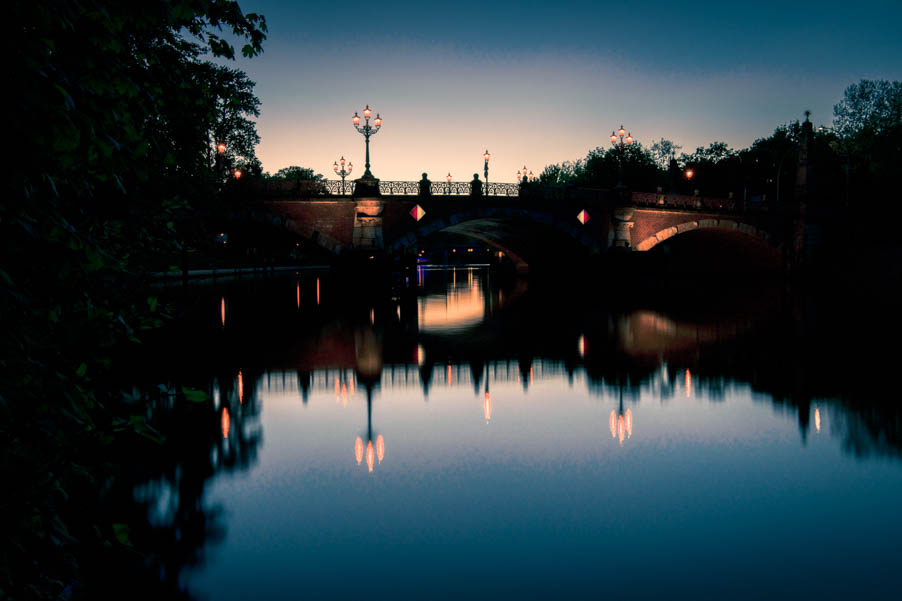 Visible banding in the sky and water.
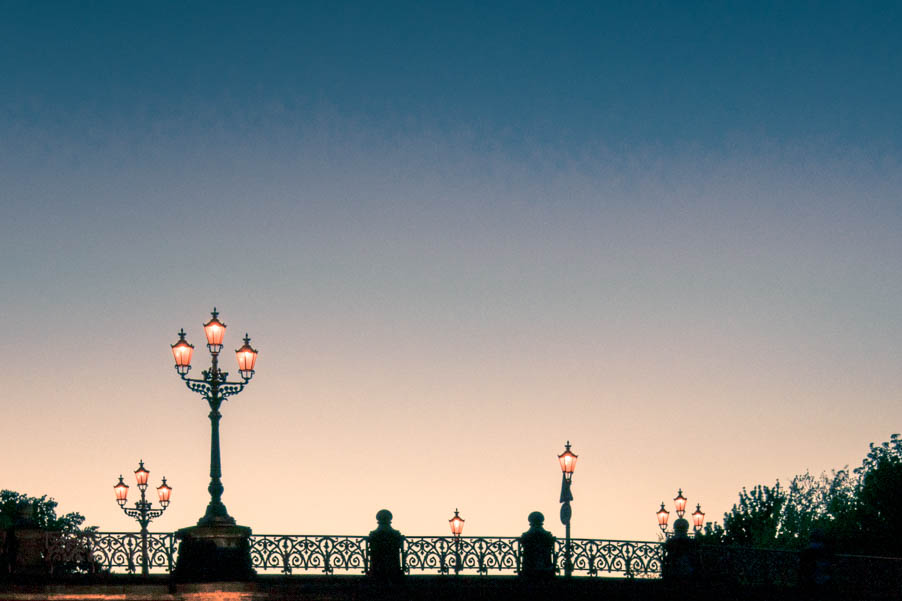 Same picture zoomed at the sky. You can see the tonal gradation.
This allows a much finer gradation of colors and avoids banding and this is only possible in the raw format. If you take your pictures in jpeg you lose information in colors. The good news is if you edit your photos in Lightroom the standard setting is 16 bit and do yourself a favor, don’t change these settings. Of course it takes the double storage space but you have a lot more possibilities to edit your photo.
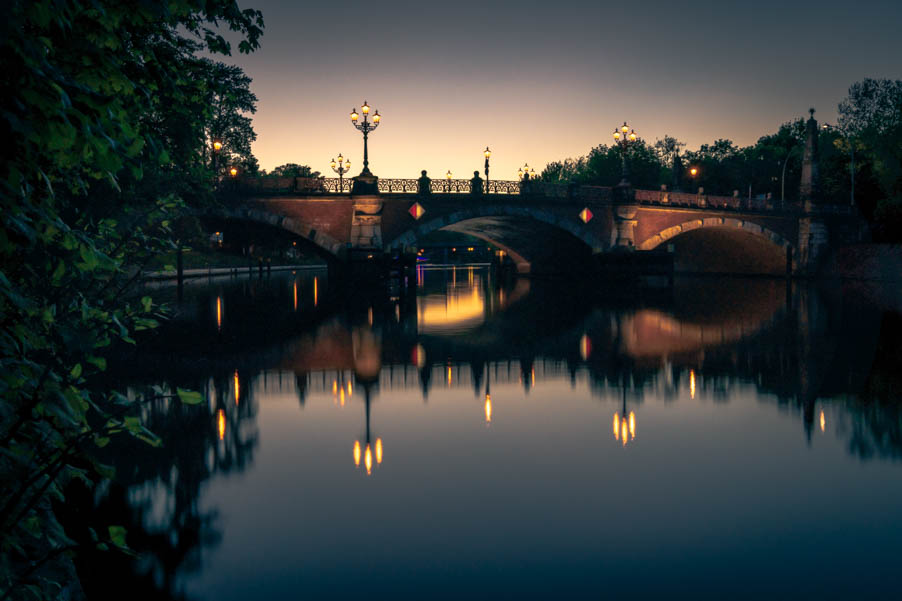 The 16 bit version, no banding and a smooth gradation. More hues and more drawing in the shadows. The edits have the exact same settings.
In the raw converter in Photoshop is 8 bit the standard setting. This can be changed when you open a raw file and click on the bottom for the workflow options. There you can change the depth to 16 bit and you should also change the gamut to the ProPhoto RGB for more play and for a higher future security. If you want change it when the picture is already imported, provided the source file was recorded with a larger color depth, you can go to Image, Mode and change there the color depth. The editing in 16 bit needs of course more resources but nowadays the platforms where you can edit a photo are powerful enough for more extensive color work.
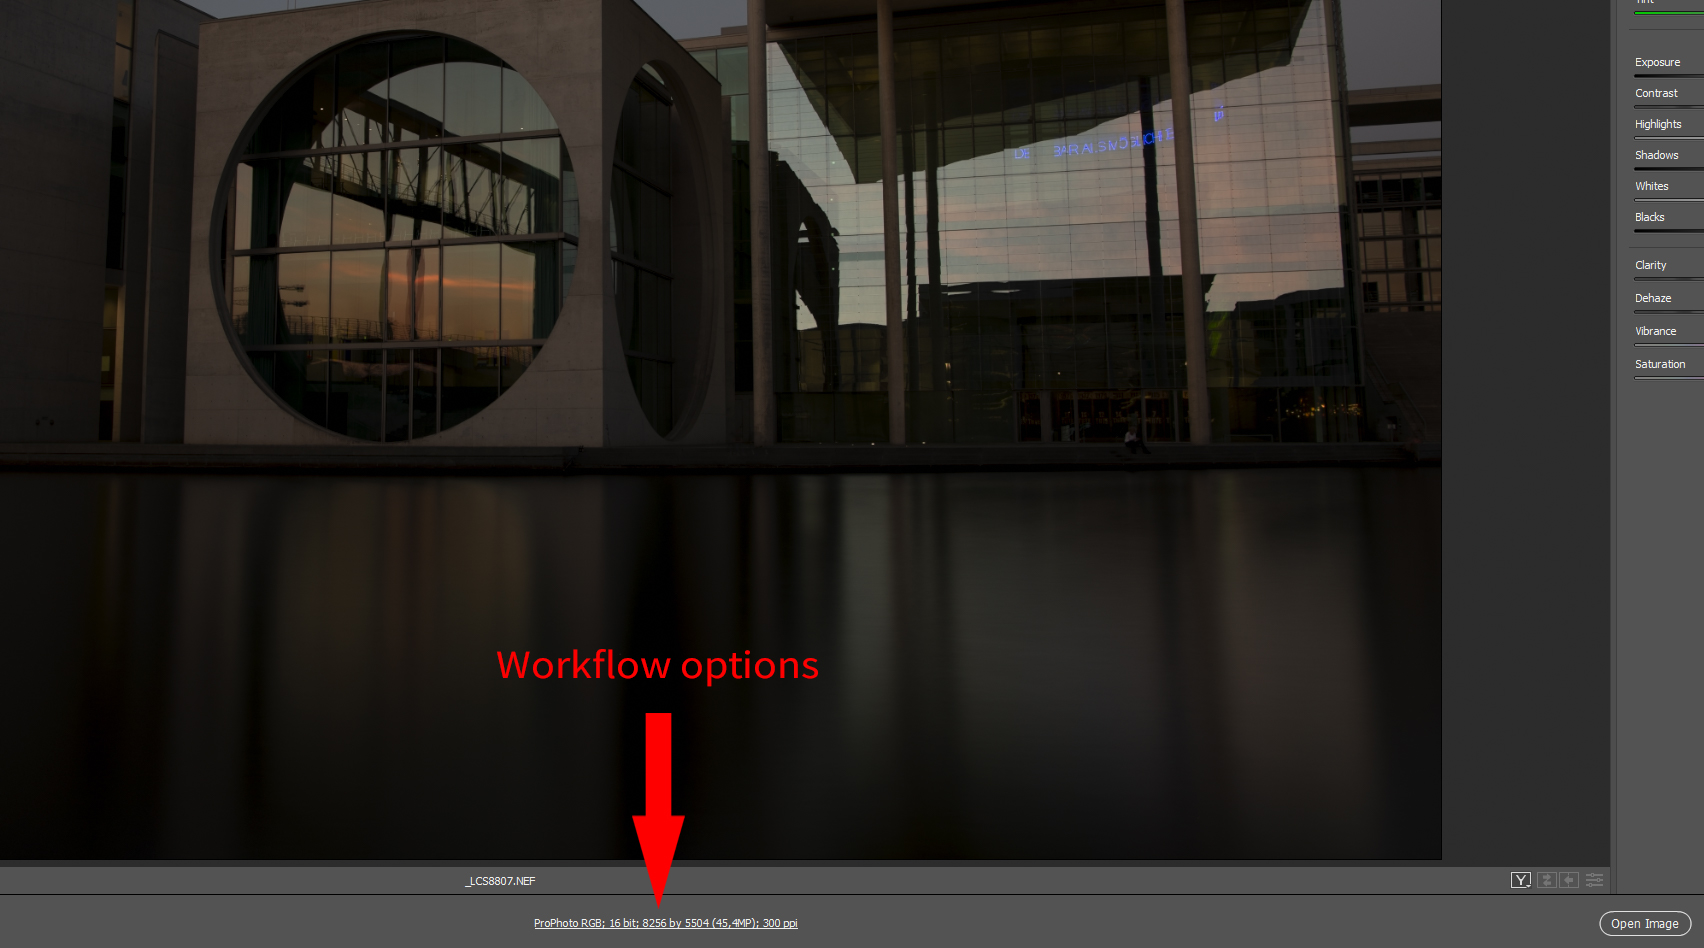 The workflow options for camera raw.
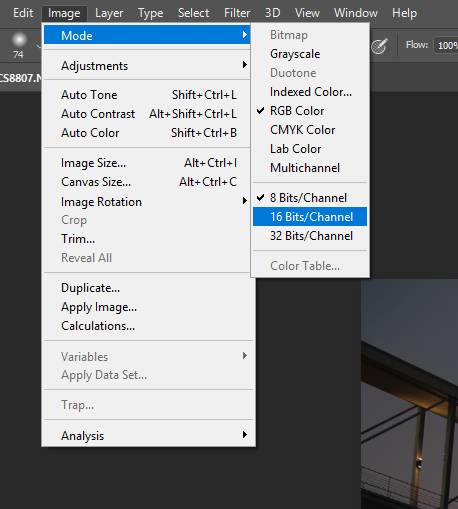 Changing the color depth after opening the file.
These instructions are only intended to provide for quality awareness and how recommendable it is to make full use of all the possibilities offered by a camera.
Report
My comments