11.09.2017

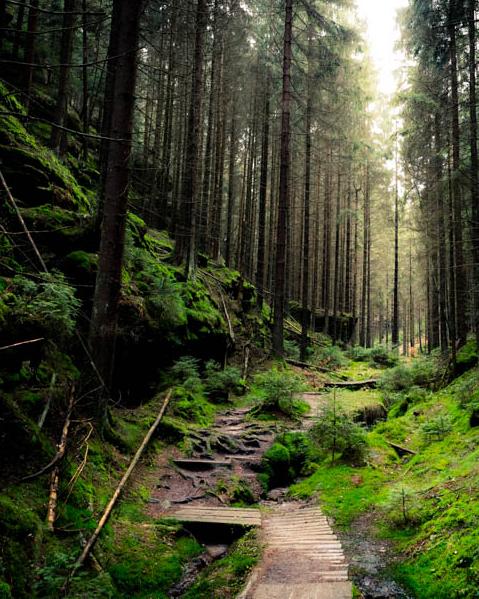
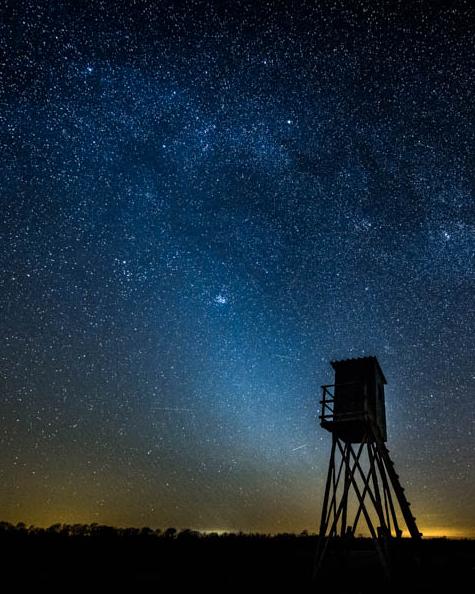
New pictures have arrived! Go to the gallery and enjoy new high quality shots. The landscape category has the biggest growth this time. Many photos from my trip to the bavarian forest in August. Lovely fog, gorgeous sunsets and some storm. And of course several drone photos and big panorama shots. You will find the latest added pictures below in the category view.
Leave a comment!
 No comments
05.09.2017

The second part is now online. This time it's all about the aperture.
The Aperture
The aperture of a camera lens controls how much light is falling on the sensor. It reduces the opening in the inner of the lens for less light. If you adjust a higher – the higher the number the smaller is the opening – aperture at the same exposure time, you will get a darker image. So why should you set a higher aperture number? To receive more depth of field or just to darken your image, because with a wide open lens the image would be overexposed. To break it down.
Depth of field
This term describes how wide the range of sharpness of an image is. The aperture is measured in f-stops. If you take a picture with the f-stop (aperture) 2.8 the depth of field is not very big. How wide the depth of field is depends on the focal length you use. If use a wide aperture on a 300 mm (telephoto), we stay at 2.8, the depth of field would be only some millimeters wide, wide enough to get the eyes of an animal sharp. If you use 2.8 at 14 mm (wide angle) the depth of field is some meters wide. The open – or a bit closed – aperture setting is useful for portraits or if you want to separate your subject from the background because the background is getting blurry (depends how far the subject is positioned from the background). The correct term in photography slang for a smooth blended background is the japanese word “Bokeh”.


When you shoot with a small aperture, that means you have a bigger f-stop number for example 8, than you start to reach the maximum sharpness of the lens. Almost all lenses have their sharpest performance between 8 to 11. After 11 the diffraction blur begins and the sharpness is moving away from the center of the image. If you want to know more about diffraction blur you should use an encyclopedia of your choice because this needs a very scientific explanation. So keep in mind if you wanna get the maximum sharpness of your lens then choose an aperture between 8 and 11.
Vignette
Every lens has vignetting at the start aperture. If my lens carries a description like "24-70 mm f-2.8", I can use the aperture 2.8 at every focal length and it is the widest opening of the lens. There is a “problem” at the wide openings: the corners of the taken photo are darkened. The lightrays which hit the corners of the sensor are shadowed, because they don’t go straight through the barrel of the lens, this is construction-conditioned. You see the difference in the center of an image: it is brighter than the corners. But if you close the aperture, for example 5.6 the vignette becomes less, almost not more visible. And otherwise you can remove the vignette by software nowadays by one click. For me this is the smartest way.
Aperture is more relevant for composing than to compensate the exposure time
Of course it is easy to bump up the aperture if you have bright light conditions to darken the image. But the aperture is more a composing tool than an exposure tool. The important part is the depth of field. I would not recommend to take a portrait with f-stop 8.0 just because you get the maximum of sharpness – the background of the photo would become very fretful and the picture is then uncomfortable to watch. If you take landscape photos or architecture the small apertures (high numbers: 8, 9 and so on) are compulsory to reach the maximum level of sharpness. With a full depth of field you let the viewer look in the far and allow him to explore things in the foreground at the same time. Topics like portraits or stills live from a calm background where the subject is undisturbed and can take effect on the viewer. It recommends to play with different apertures on the same motif.


28.08.2017
We start with the entrance-series in photography. I will bring close the fundamentals of photography for a better understanding and just to take better photos. Leave a comment for any questions or ideas.
The Exposure
There are three possibilities how to control the brightness of a photo. One of them is the exposure or the shutter speed. This describes how long the shutter is letting light falling on the sensor (or the film for the nostalgics). So the correct term would be exposure time. You longer expose the sensor the image will get brighter and brighter. If you wanna get a sharp image the camera should be hold still or be mounted on a tripod during the exposure. Otherwise you get light trails or just a blurry image.


The most cameras are offering exposure times from 30 seconds to 1/8000th of a second. You want to take a photo in the dark or want to capture a scene with weak light conditions? Then you need a tripod and a long exposure time. You want to freeze a fly during flight? Then you need a short exposure time. Both examples read a bit special but illustrate how the exposure time work.
The two sample images above have a completely different exposure time: the image with the lightning was 166 seconds exposed. The plane was only for 1/4000th of a second exposed to freeze it in the air.
This is the logic part of exposure. When you expose the sensor the camera should be hold still. But the exposure is also a creative instrument:


The left picture shows the “correct” exposure respectively what the metering has measured before the shutter was triggered. The right picture is showing a corrected exposure on a creatively way. The darker tones making it more dramatic and attractive for the human eye.
The key for a successful exposure is to keep this formula in mind: the exposure time should never fall under the size of focal length you have. If you shoot with 50 mm focal length the exposure time should never fall under 1/50th of a second. With this limit you can take sharp images. Nowadays there are very useful helpers like the VR on Nikon or IS on Canon cameras. These helpers allow you to fall below this limit. With activated stabilization I’ll get a sharp image even at 1/25th of a second and if you have really calm hands with another bit longer exposure time.
31.07.2017

A HUGE update for the gallery is now online! Over 100 high quality photos have been added in all categories. And I added a new one: Aerials. The Phantom 4 is a nice tool for aerialshots so I wanted to share the results with you. Don't wait and click on the gallery button above and see all my photos I have made over the years, from places like Hong Kong, Saxon Switzerland, Rügen and of course there is a lot to see from Berlin.
On my YouTube channel you can watch now a new video. Several impressions of the popular baltic sea island Rügen. One half of the material were made in November 2016 and the other half in June 2017. This video is more a technical demo, for the Nikon D750 in combination with an Atomos Ninja Flame just to see what is possible in case of color correction and grading.