03.03.2018

For this guide I will presume a panorama head, a so called nodal point adapter. If you just use your normal tripod head, no matter if it is a ballhead, a three way or a two way head, you are able to shoot panoramas, but if you have a close foreground, for example rocks on a beach, in your frame, you will get parallax errors (incorrect overlapping areas), because it’s not enough to pan your camera horizontally. The nodal point adapter is there to avoid these errors and some of them allow also to create multiple rows and then you are able to enter the field of gigapixel photography. But one after another.
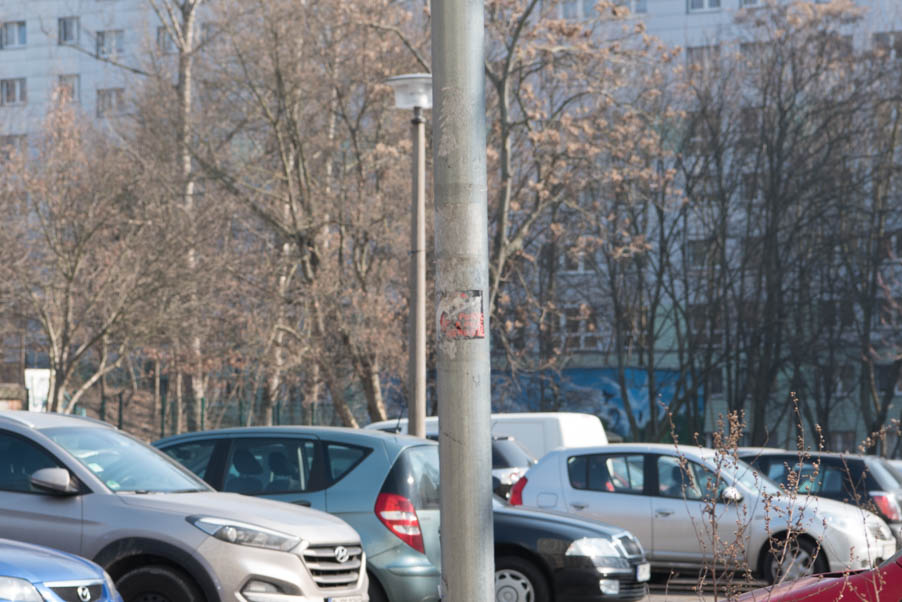 Parallel lines in the center of the frame.
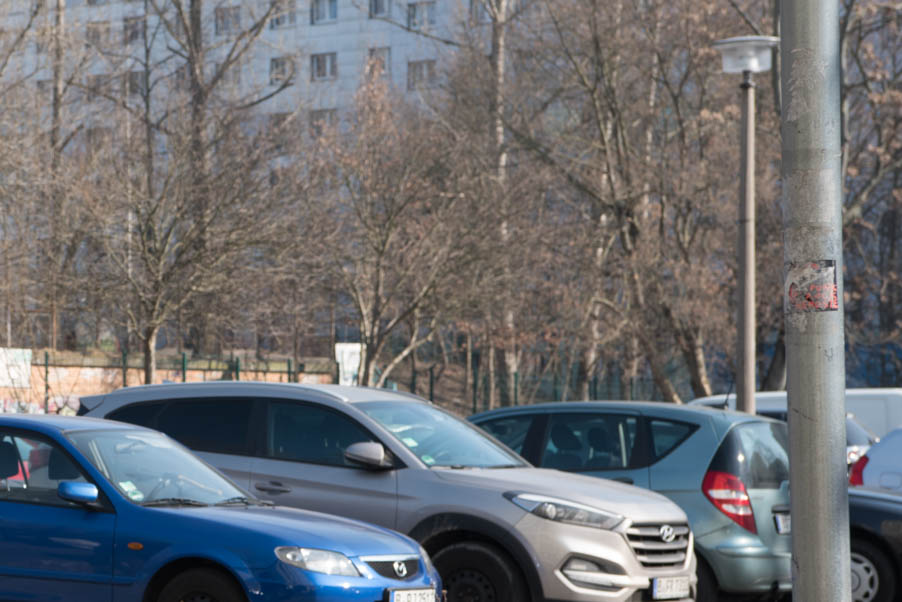 No adjusted nodal point: the space have changed after the camera was turned to the left, on a normal ballhead.
The equipment
Tripod
Panorama head
Leveling base
Remote controller
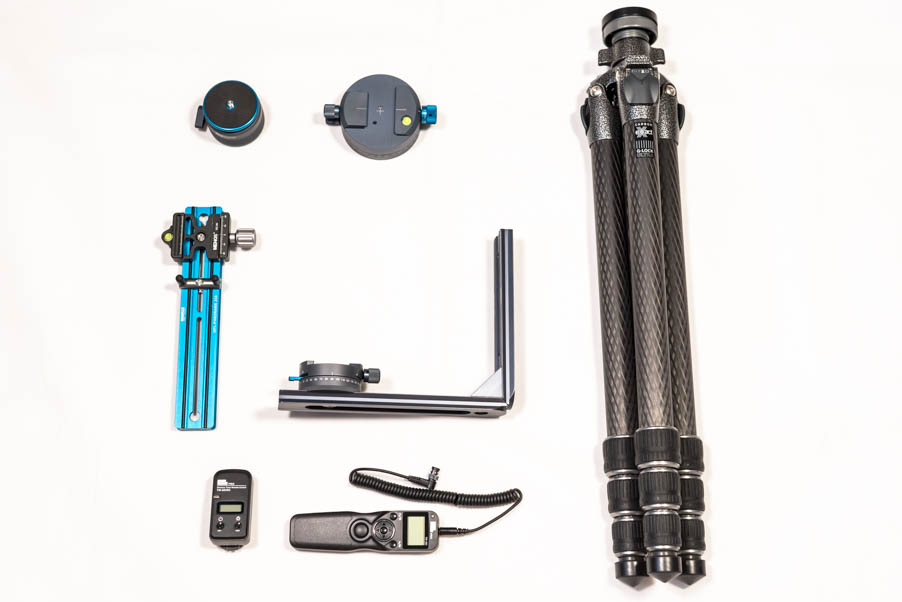
To work comfortable and to avoid any kind of shaking, you should release the shutter with a remote controller, because the whole construction is susceptible for vibrations. And you have to rotate the camera, for every new shot. The tripod should be capable to carry some kilograms, because a high quality panorama head brings some weight.
The panorama head can be a normal panorama head, which allows one row panoramas or a head for multiple rows. In my case I decided me for a multiple row nodal point adapter, of the German manufacturer Novoflex, the VR-System PRO II. The name says it already: you can also create 360 degrees panoramas, spherical panoramas, for virtual reality applications for example. But we want to concentrate on normal panoramas. What also is absolutely advisable is a leveling base or head. This kind of head allows to set the correct horizon. A panorama head alone cannot be adjusted for a straight horizontal line, you could adjust the horizon with a different lengths of the tripod legs, but I think everyone can imagine that would be more than annoying.
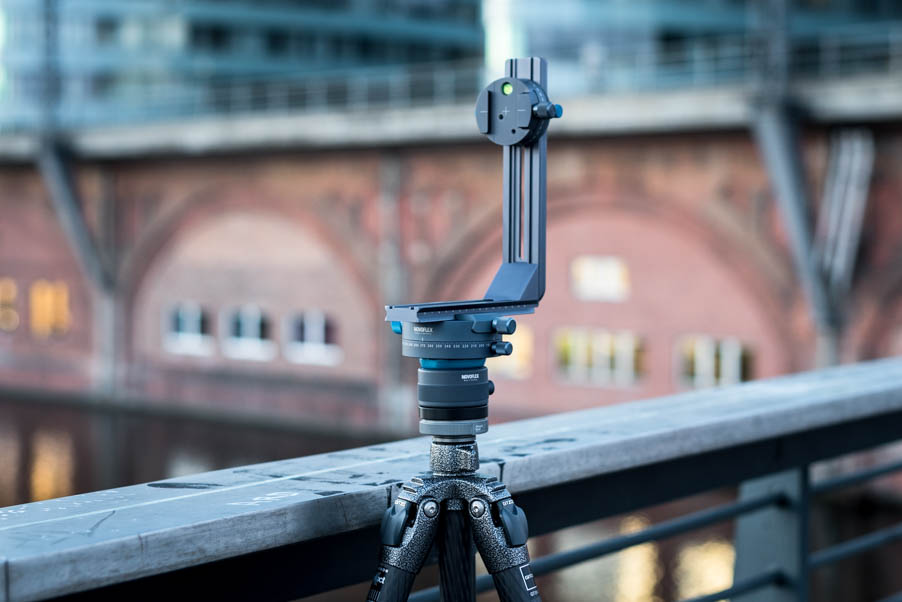 The whole setup: leveling head is mounted on the tripod and on this the panorama head, so you can start the action.
The settings
This part is the most important for a successful stitching in the panorama software, but this will take some time and patience. At first you set up the nodal point. This is the easy part, because every nodal point adapter has it’s own nodal point marked at the direct center on itself. On the Novoflex head, is the nodal point marked as a cross. You center this cross with help of the auto focus field which should be in the center of the viewfinder. At Nikon cameras you do this by pressing the OK button, then the focus field will center itself in the middle of the frame and for more comfort you should do this in the live view mode. The L bracket of the panorama head must be shifted until the focus point of the camera lies directly on top of each other on the cross marking of the head. You need to do this step for every lens extra. So if you mount a new lens and it doesn’t matter if it has the same focal length or not, you have to set the nodal point again, because of another construction of the lens and the same goes for another camera. With this step you have set the x-axis.
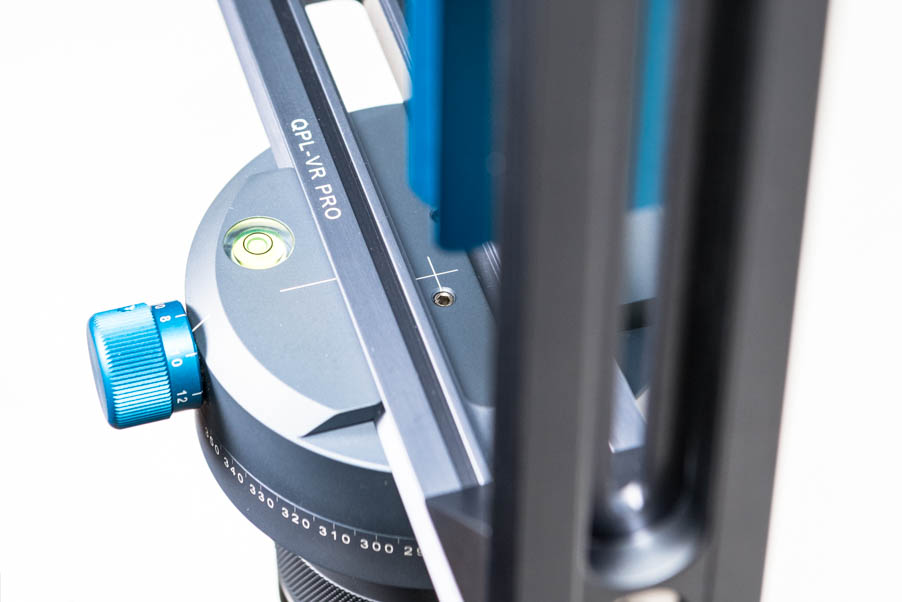 Marking for the nodal point.
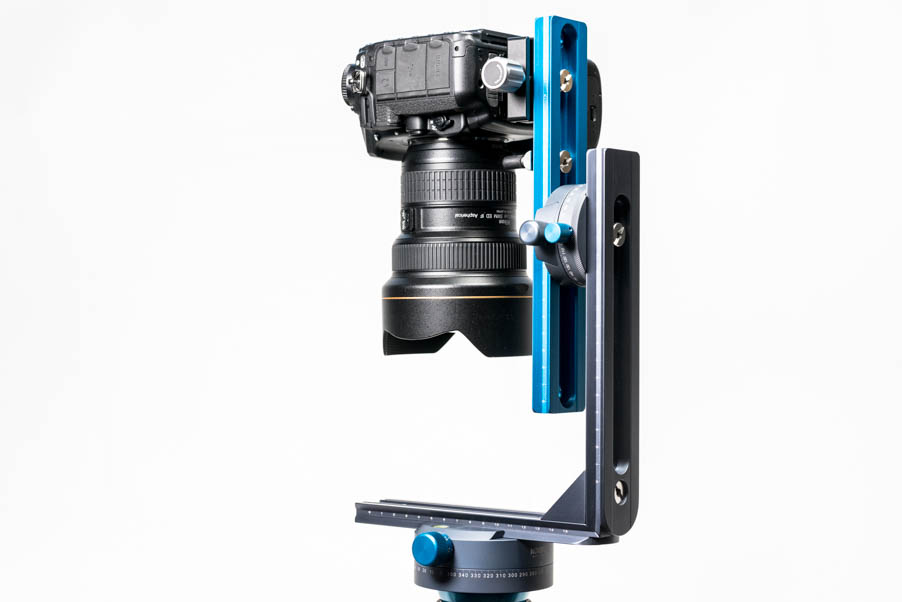 Adjusting the head.
After you have set the nodal point you need two parallel lines. This could be two light stands of a room, a shelf and a door frame or two lanterns in the outside. The camera must be positioned in such a way that the two parallel lines just overlap. When you pan now the camera to the left or to the right and the space between the two lines stays the same, then you are already finished. If not, you have to set the z-axis. This axis is the plate where the camera is mounted on. You have to do this until the space between the lines stays the same. Fortunately all parts have a scale in centimeters and I would recommend to do it in 5 mm steps.
It is highly recommended to write down the determined values and keep them in the bag of the camera.
If you want to work with different focal lengths you need to know the values for panning, you will find these values in the manual of your panorama head. There is also a difference between an APS-C and a full frame sensor for the panning angle, but all these information should be in the manual. For example: If I shoot at 16 mm the panning part must be set to 8 sub steps to pan the angle for 45 degrees and to get an overlap crop of 38,94 % with a full frame sensor. Make a photo or a copy of this table and put it also in the bag or save it on your phone.
When everything is set, you have found the nodal point of your camera and lens. When you take photos now, parallax errors should not appear in the stitching process.
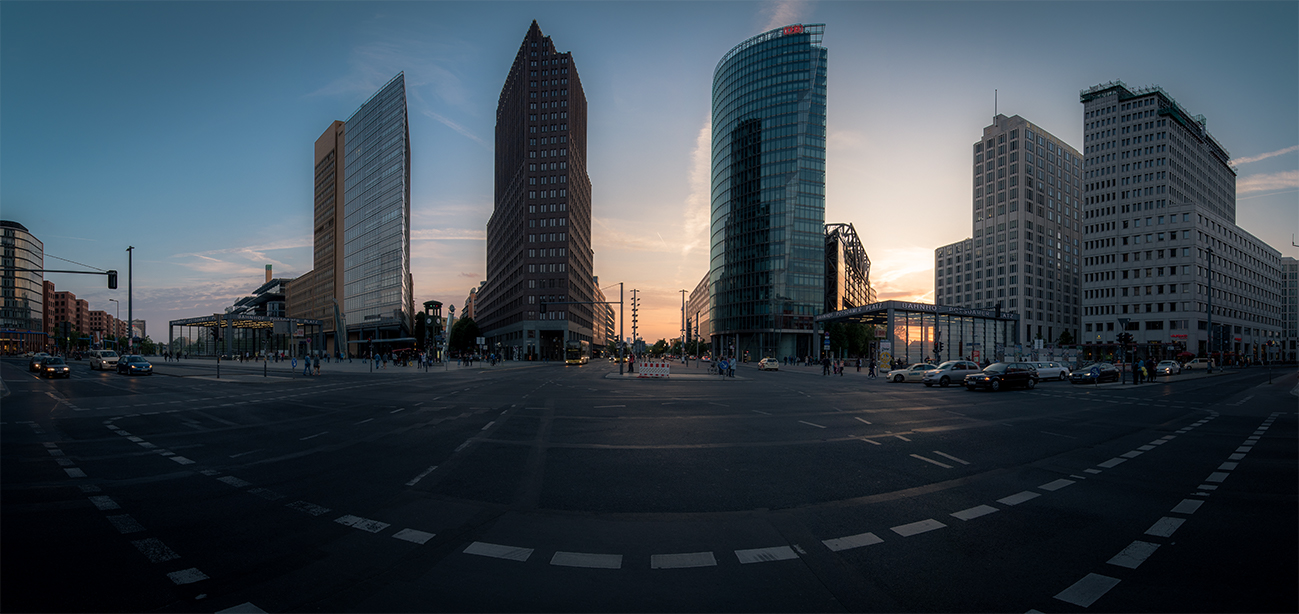 Potsdamer Platz during sunset.
The shooting
Now you can start. Go out and find your desired scenes you want to take. A panorama photograph can also help when the camera is not able to fit everything in one frame, even at the shortest focal length which is at your disposal.
If you want to take photos during the blue hour, for example, you should set a fixed color temperature, because you will see the single shots in the panorama, if they don’t have the same white point and what is also recommendable is a fixed exposure time, so you should work with the manual settings of your camera. It is advisable to find the subject you want to photograph in the middle of the picture, for a dramatic composition, so the camera should be positioned in front of the main subject. The focus should be also fixed on the main subject, for a natural composition. So if you have set the focus, the color temperature and the exposure time, you can start to shoot. For a more logic file handling afterwards the first shot should be also the first picture in the row, because we write and read in Latin letters, the first shot should be on the left and for a symmetrical result, the same number of photos should be taken on both sides of the main motif.
Get sure to wait some seconds after each pan of the head for the next shot to avoid shaking and vibrations. And to get really sure you can use a remote.
 Sunset in the Bavarian Forest. Made of 15 single exposures at 200 mm.
The stitching
For my example I’m using Photoshop which creates in the most time very good results. Of course there is more dedicated software like Panorama Studio or the very well known PTGui. But Photoshop offers good possibilities to enter in the panorama world. The first step should be to set the workflow options of Adobe Camera RAW. What we want is a lossless and for the future useful file. So you should open a random RAW file of your camera in Photoshop and the Camera RAW dialog will open. In the bottom of this window you will find the options of the workflow and in this option window we set the color depth of the RAWs to 16 Bit, because actual camera RAW formats offer a color depth from 12 – 14 Bit. In addition the color space should be set on ProPhoto RGB. No screen in this world can display the full gamut of the ProPhoto RGB color space, but it offers much more information than the sRGB or Adobe RGB gamut and as mentioned, your intention should be to work with best possibilities which are nowadays are available.
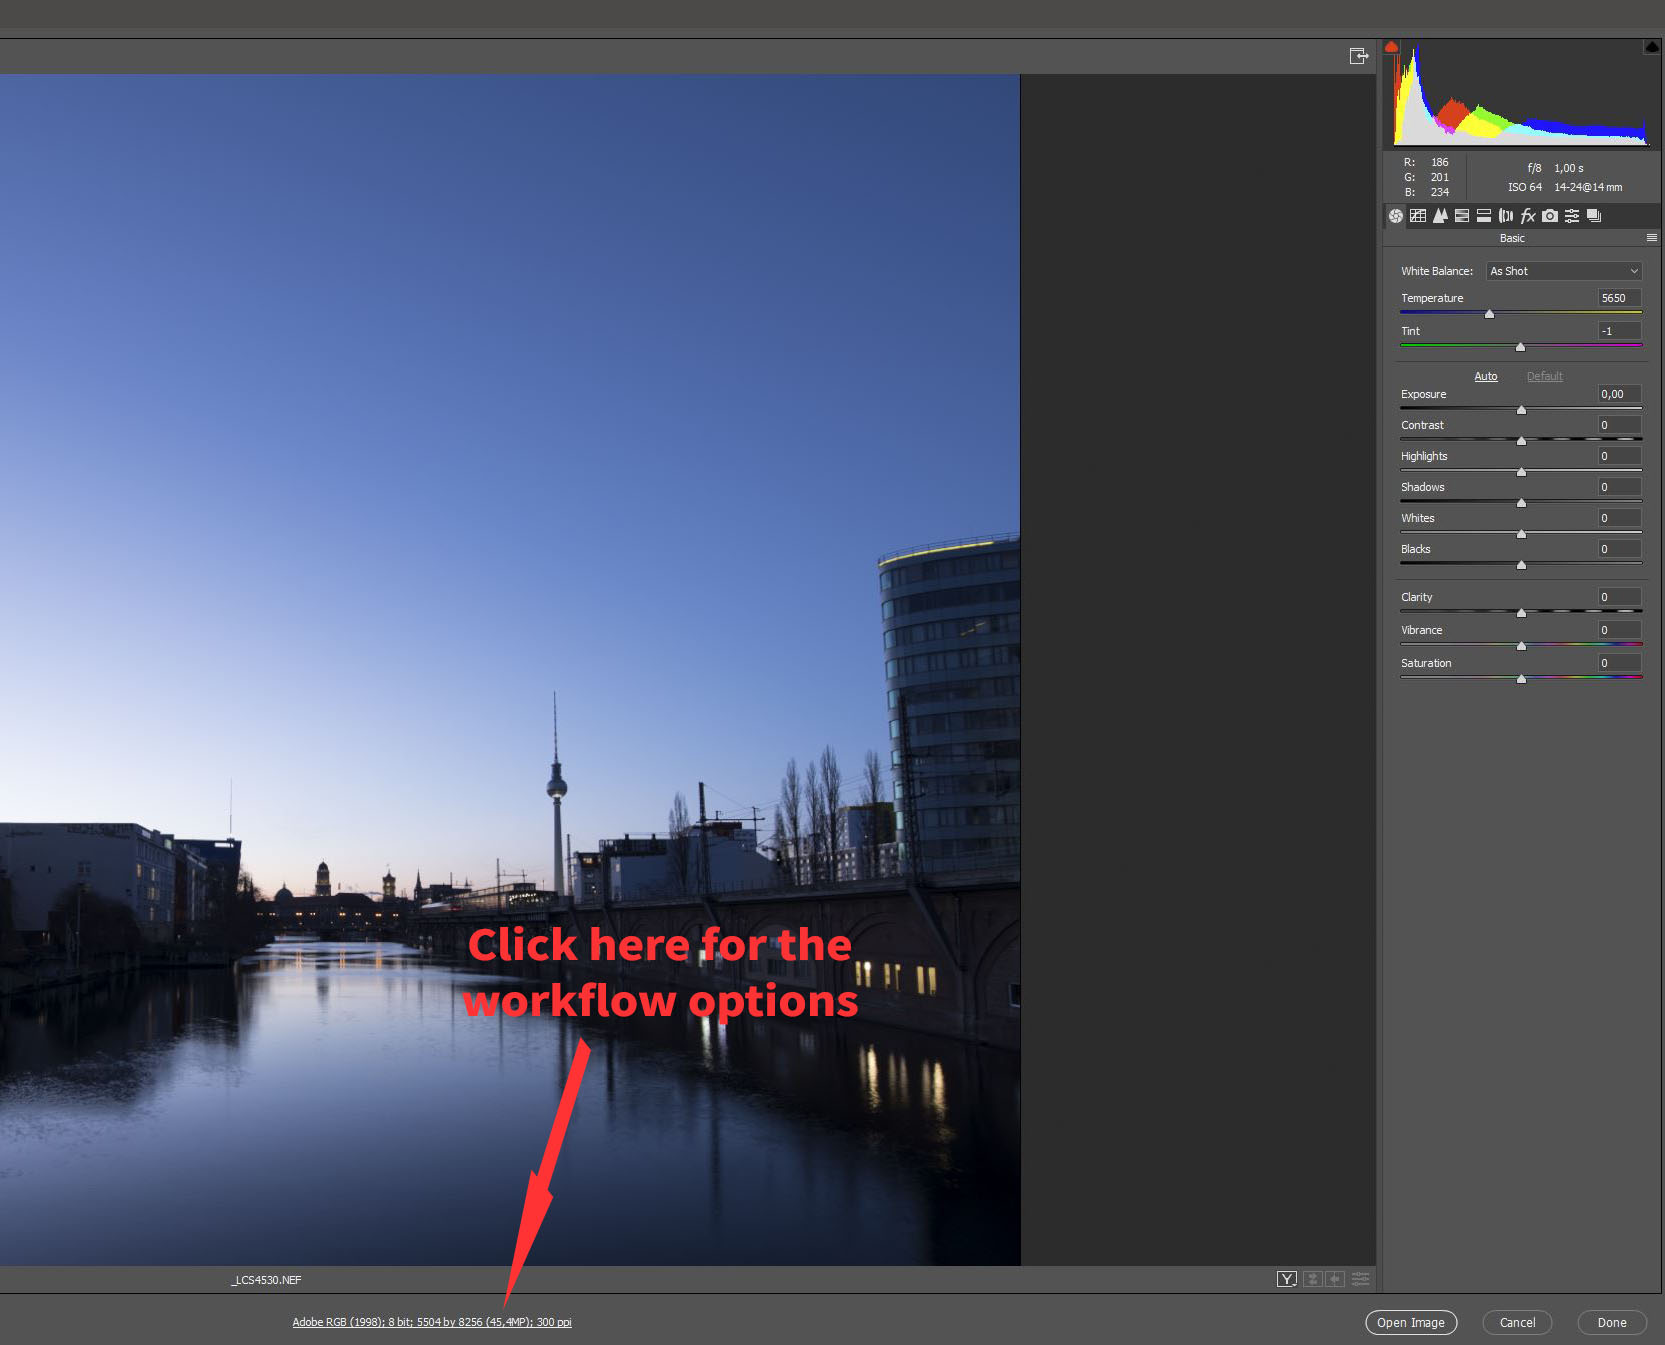 Camera Raw dialog after opening a raw file in Photoshop.
These settings will be permanently saved, so every RAW you will open, will be opened in a 16 Bit environment.
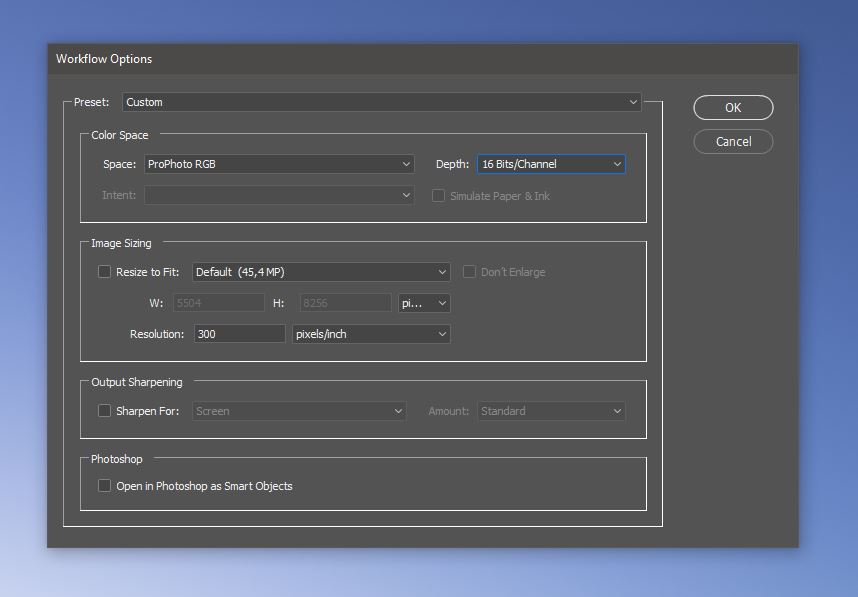 Workflow settings of Camera Raw.
And now you can start with the stitching. For this you have to click on “File” go to “Automate” and click there on “Photomerge...”
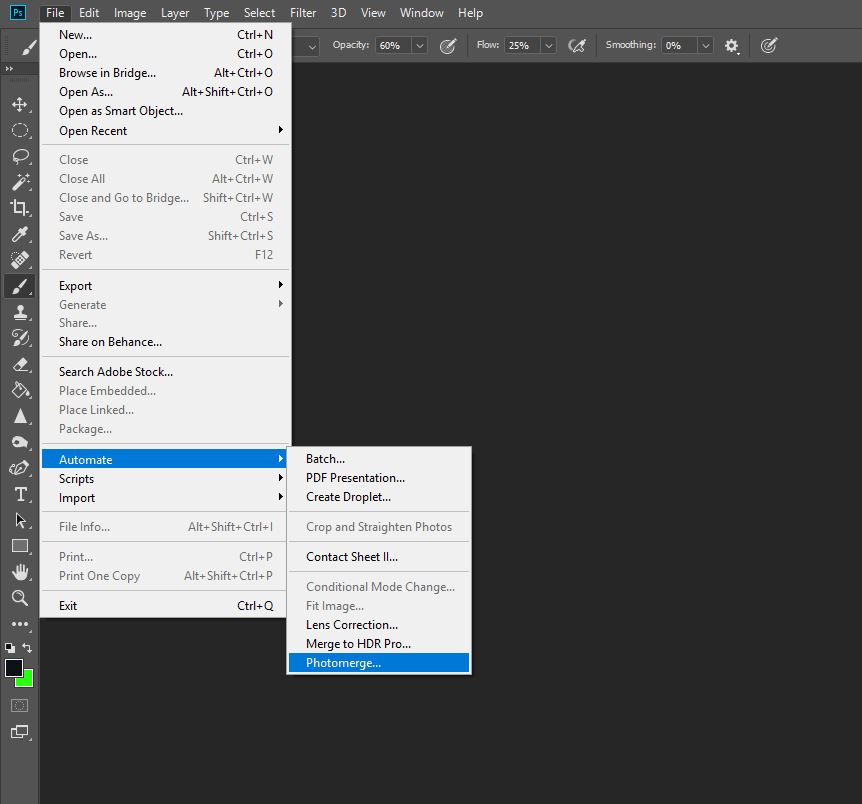 Location of the Photomerge function.
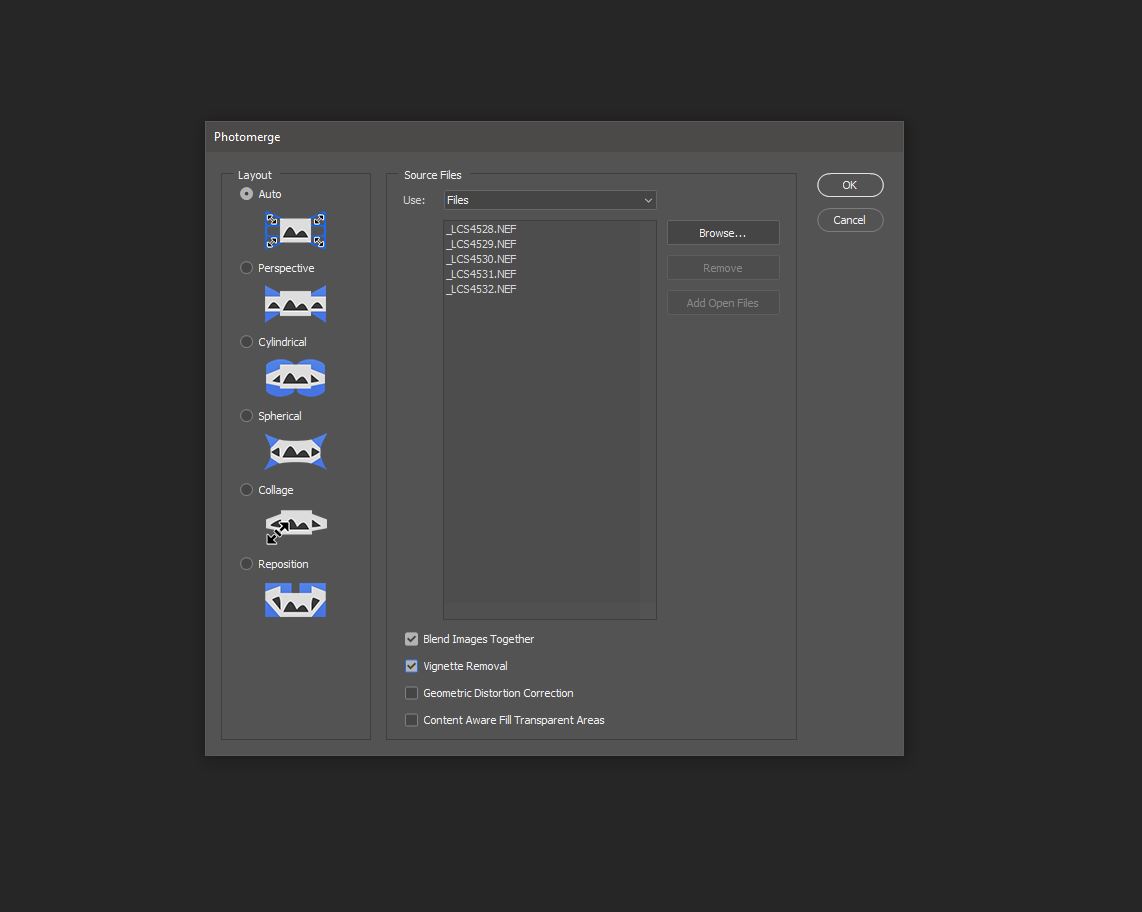 In this window you load your images or the folder where are they saved.
For the layout you should check “Auto” and should also hit the checkbox for “Blend Images Together” and the “Vignette Removal” should also be activated. The other two options provide a too big incision in the finished image, i. e. they cause distortion or other unwanted things. After everything is chosen you can click OK and Photoshop will start the stitching of the images. This take some time, it depends how many shots you use for your panorama.
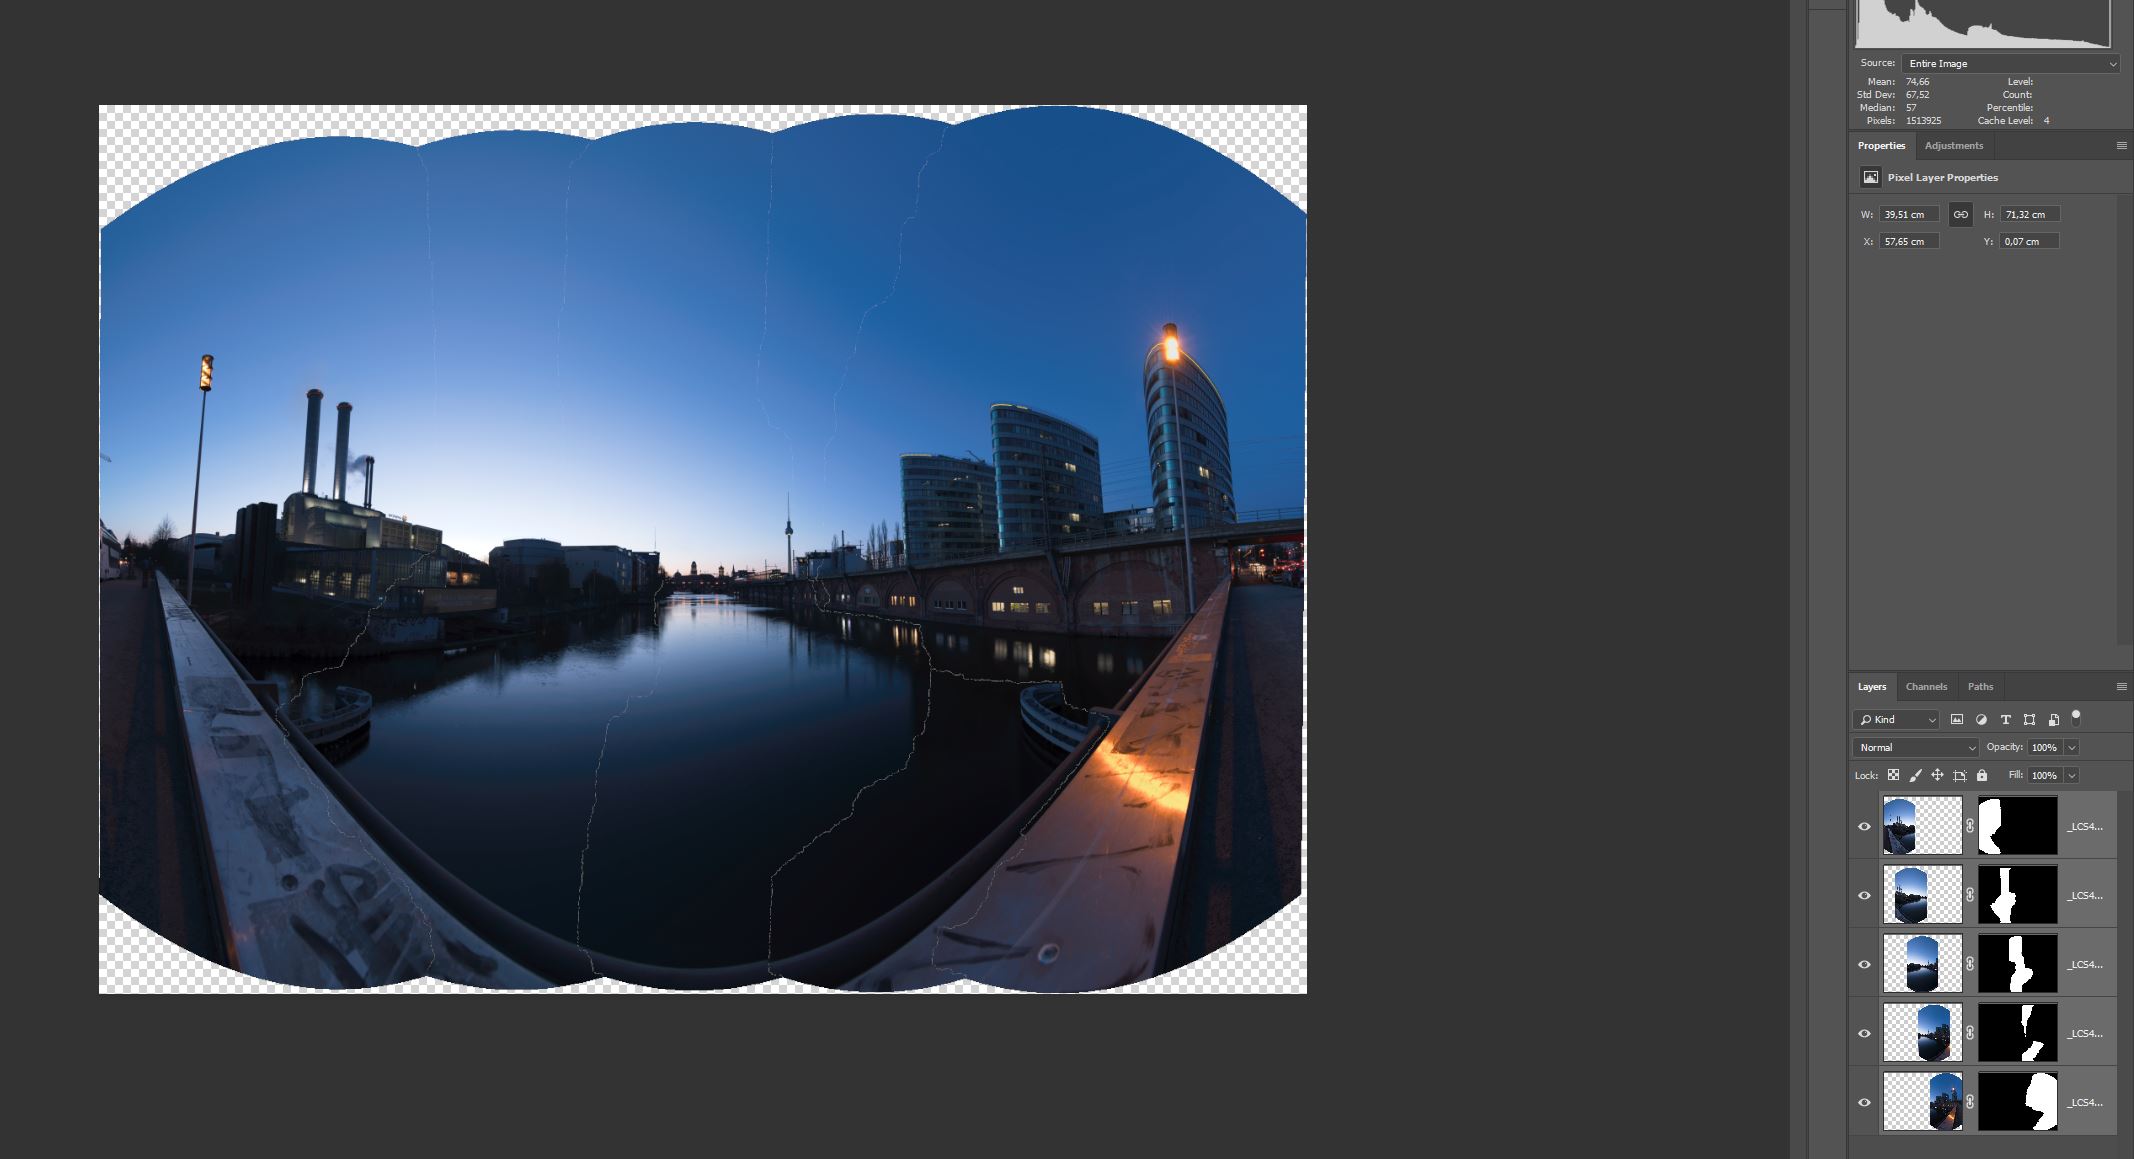 Five photos shot at 14 mm with manual camera and white point settings.
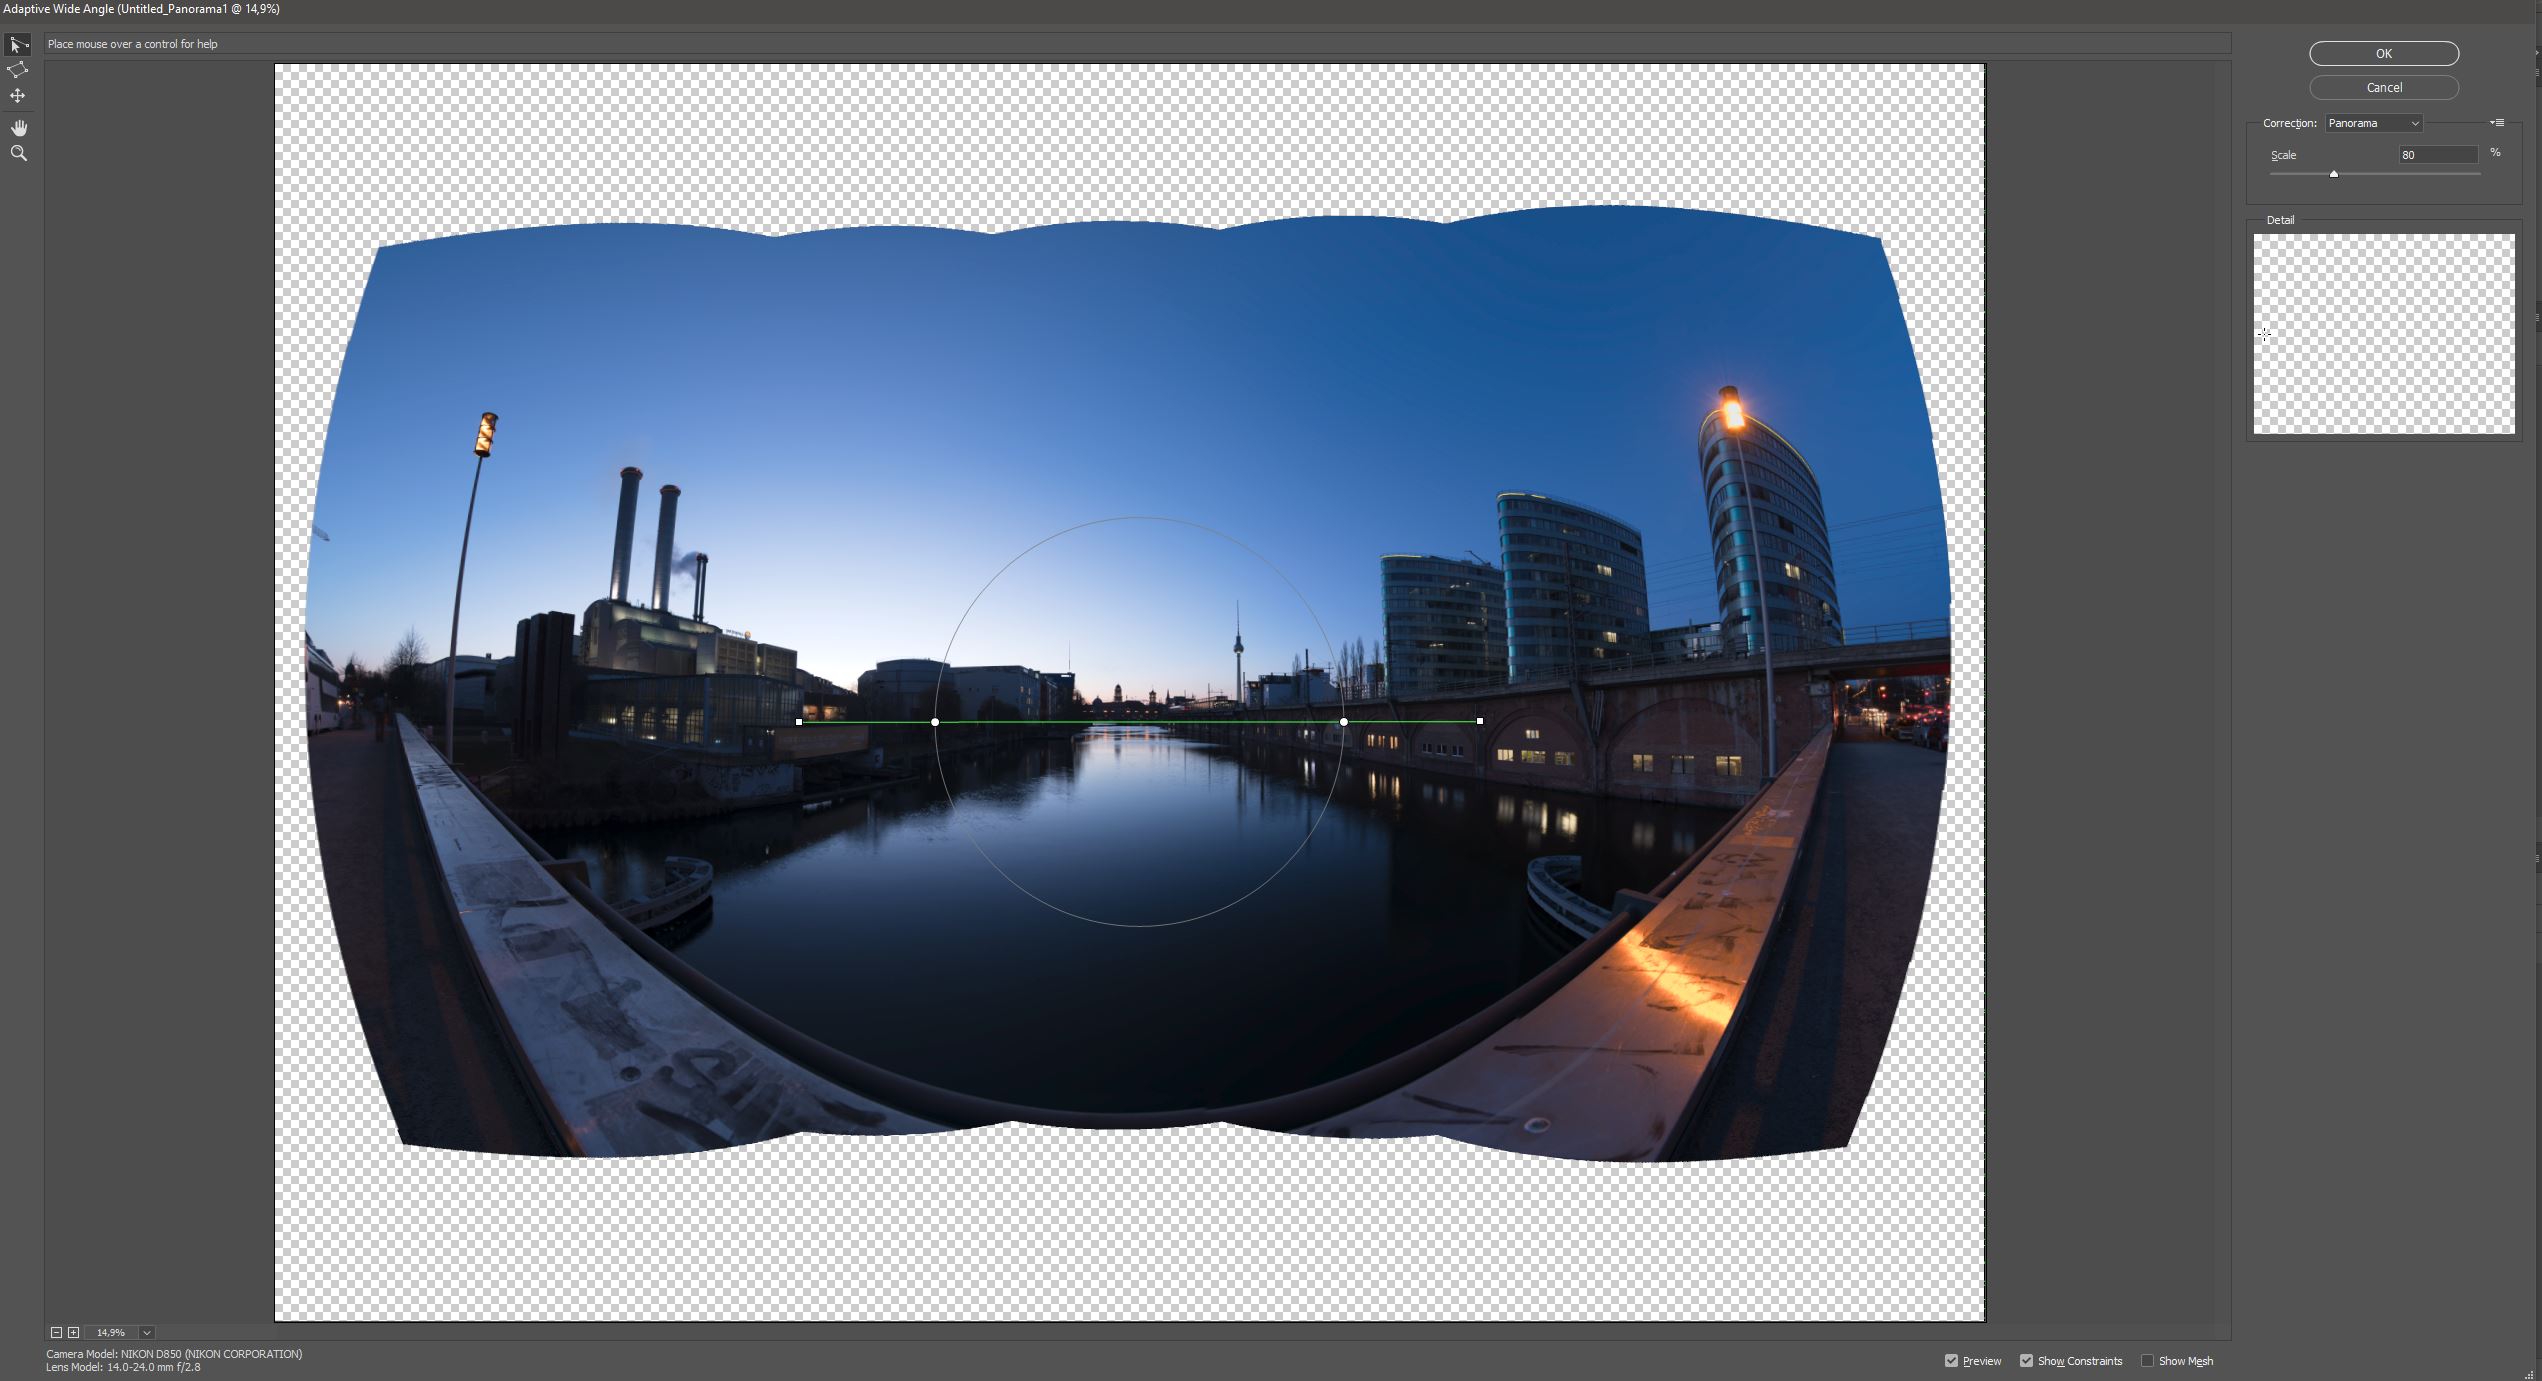
When the stitching is done Photoshop added for every photo a layer mask and blended with this method the pictures to one. Before you want to adjust anything to the whole picture you have to mark all layers and merge them to one layer, by clicking right and select “Merge Layers”. Now you can edit the panorama with the camera raw filter comfortably, and this is the point why you should use a 16 Bit editing, because you cannot change it afterwards the pictures have been already imported. If you are dissatisfied with the perspective of the image you can use the Filter: “Adaptive Wide Angle” for perspective corrections. A mighty tool to straighten the horizon or vertical lines. And you can change the projection of the whole panorama. Play with these settings and find out what is the best for you.
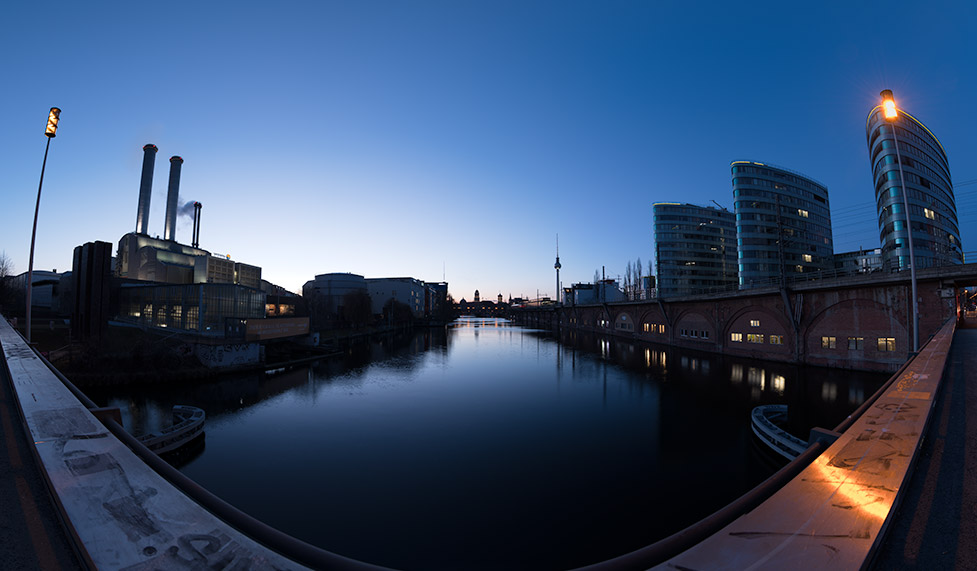 Stitched panorama without edit.
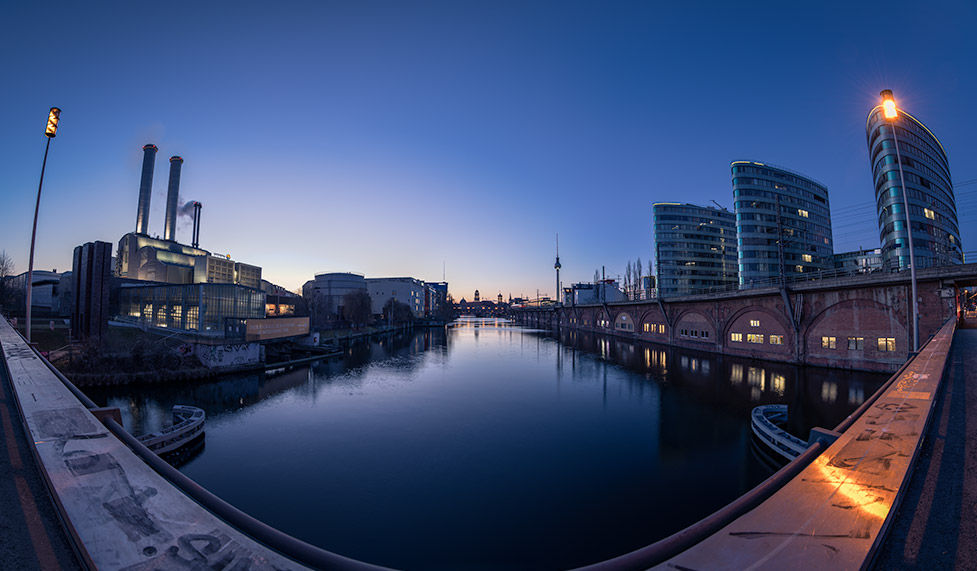 Stitched panorama with final edit.
Lightroom can also stitch panoramas but only single rows, but that makes it just as good as Photoshop. In Lightroom you create a panorama with just a right click on desired images and use there the “Photo Merge” options. Panorama photography is a really interesting tool to capture the reality in big pictures. And as mentioned with a head which allows to shoot multiply rows you are able to create gigapixel pictures with an incredible amount of detail. Like the following picture which was made at 52 mm with 18 single shots - the final image has a resolution of 27326 x 12261.
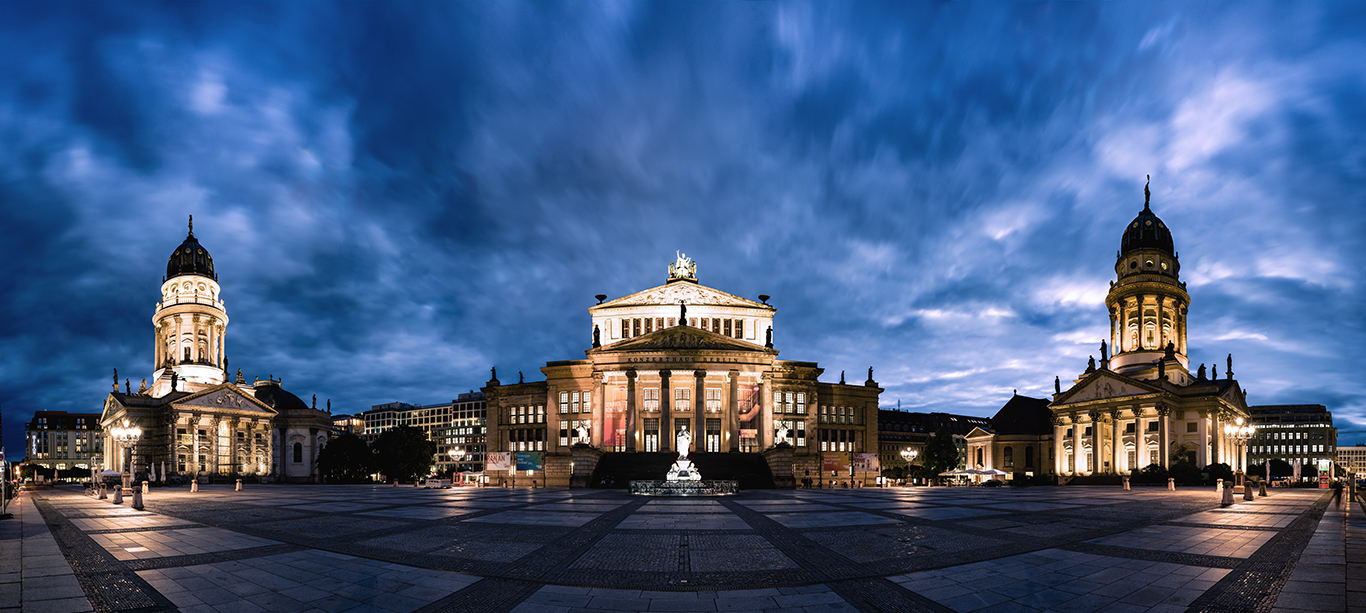 Gendarmenmarkt in Berlin at the blue hour.

Report
My comments