
16.03.2020

Chromatic Aberrations
There are two types of chromatic aberrations: longitudinal and lateral. The longitudinal chromatic aberration occurs at the edge of the lens because light with different wavelengths is refracted differently. So this will result in color fringing (green and purple/magenta) around objects and edges on the image, also in the center.
Companies use different kind of lenses to reduce this aberration, in this case there is a combination of a convex and a dispersing lens, what creates an achromatic lens. This type bundles the wavelengths so that the longitudinal errors are minimized. And if the used lens still have too much visible fringing, what occurs especially on long prime lenses, one can stop down the lens. Additionally and thankfully it can be reduced in post.
Lateral chromatic aberration occurs more on wide angle and fisheye lenses, in the corners. This aberration results as blue and purple fringing. In contrast to the longitudinal errors, reducing the aperture does not help. This can only be reduced digitally by using a software.
Chromatic aberrations is an issue, but can be eliminated by using a Software. In Adobe’s Lightroom for example it is at the most time just one click. If this is not enough, one can exactly define the color fringing in the image and Lightroom makes it disappear completely. And the manufacturers are building better and better lenses due to technology advance and it should be clear if one spend more money on the lens the better the image quality is.
 A susceptible situation for chromatic aberration - a sunset.
 The leafs on the bright background creating a high contrast what leads to a slight magenta tint edge on the leafs.
 There is a visible magenta edge on the back of this statue and in the front of it there is a green edge.
 With one click in Lightroom you can remove this flaw. The Magenta and green disappeared by checking the box for "Remove Chromatic Aberration".
Lens Flare
A lens flare is a reflection of the brightest part of the image, the sun for example, inside the lens. The light rays of the sun hit the lens in such an unfavorable angle that the light is reflected back inside the objective. The number of visible lens flares depends on the number of lenses inside the lens.
A lens flare shows how well manufactured a lens is. To avoid lens flare or at least reduce it, is the coating important. Old lenses scatter the direct sun massively, which leads to fading, just like the human eye. Newer lenses deliver provide accurate and clean refraction of light, and then the lens flare acts like a prism.
If the lens flare is taking up to much space in the image or just inappropriate one should use the lens hood and the angle of the camera to the sun (light source) can be adjusted, till the lens flare is gone. And thankfully to digital photography one can blend to exposures of the same scene in Photoshop for example. The sun should be covered by the hand in one shot and in the exposure is just taken with natural circumstances. With this technique the lens flare can be retouched, without much using copy stamps and healing brush tool.
Another idea would be to use filters, but this could make the lens even more susceptible for lens flares. However, lens flare is not always an aberration. Sometimes it can be used to dramatize an image to show the light source is extremely bright. The viewer get a better feeling for the brightness of the image.
 The light is split into its three primary colours visible to the human eye. Red, green and blue, thanks to the angle and the lenses.
 The fully edited image with a removed lens flare with the help of Photoshop. I used here the copy stamp, the spot healing brush tool and the healing brush tool.
Distortion
Distortion is the not true to scale reproduction of an object. That is the simple explanation of distortion. This aberration occurs especially on the edges of a frame, because these objects in the area of an image are more distanced from the optical axis – the center of the image. So the result are curved lines instead straight lines. Additionally it depends also on the position of the lens to the subject. This is the so called perspective distortion and the other reason are optical distortions which are caused by the optical design of a lens. But the results are the same: distorted lines.
When lines appear in a shape of barrel, curved inwards to the viewer, then this is called barrel distortion. Wide angle lenses often suffer from this, due to it’s extreme wide field of view. Adobe’s Camera RAW converter is capable to reduce the distortion or even eliminate it. The only requirement for this is that the used lens must be in the database for lens profiles.
When the outer lines running outwards from the viewer, then the image has a pincushion distortion. This occurs especially with inexpensive zoom lenses, which offer a low wide-angle focal length up to a very high telephoto focal length. But this can also be easily removed in Lightroom for example, by one click.
 Image without the profile correction of Lightroom.
 With activated profile correction and upright function set to auto the dome of the cathedral is a little more stretched, so the vertical lines do not fall back so much.
 Without profile correction there is visible barrel distortion at 14 mm.
 This time is only the profile correction activated.
Coma
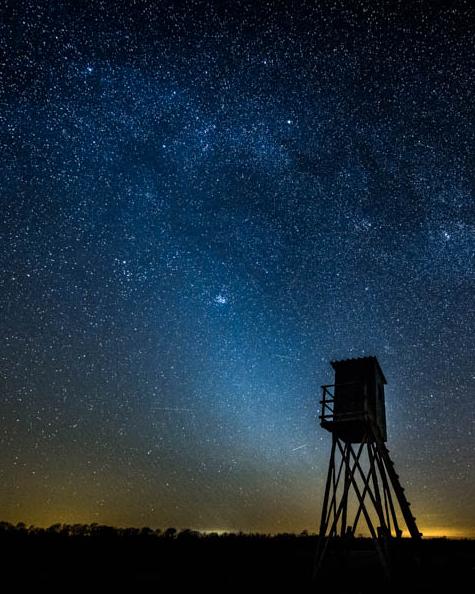
A very special aberration. It becomes almost only visible when photographing the night sky. Coma are rays of light that occur off the image axis and are reproduced unfocused on the sensor, resulting in a tail. So the stars in the corners on the captured night sky can get a cone shape, when the lens is not able to correct that.
An approach to avoid coma is to use a more sophisticated lens or to stop down. If you use the open aperture of f/2.8 for example an aperture of 3.2 or 3.5 and more. But a smaller aperture increases the exposure time of the shot, so one must find a trade off when discovering coma in the photos.
 The star sky above the Tre Cime in South Tyrol.
 The stars in the upper left corner. These start to create a trace earlier than the stars in the center.
 The center of the image.
Vignetting
Vignetting can be seen as aberration or as a creative tool guide the view of the viewer. It occurs due to the optical design of a lens. The light rays which hit the lens by the side or the corners are more blocked then the rays in the center. Large apertures favor the whole thing even more. With less light the corners of the sensor or image have a decrease in brightness, what provides a visible vignette. Prime lenses are more affected by vignetting due to it’s large open apertures, but as you can think of one solution is to stop down the lens – to close the aperture. Another way is in post processing, with one click in Lightroom, is the vignetting gone.
As mentioned a vignette can also be used to guide the viewers eye or to focus more on the subject of an image. For that there is also artificial vignetting in post processing. So why should one remove the natural vignette and add an artificial? Because the artificial way is the controllable solution. You can set the stregth, the roundness, the transition and so on. These are the Lightroom options.
I’m a big fan of add a vignette to my pictures because it dramatize the situation more and avoids from distraction of unimportant parts of the photo.
 These are the vignettes of different aperutres of the Nikon 35 mm f/1.4G. It starts at f/1.4 and the last frame shows that the vignette is at f/8 gone.
 The natural vignette of the lens without correction.
 The vignette was removed so the corners became a bit brighter.
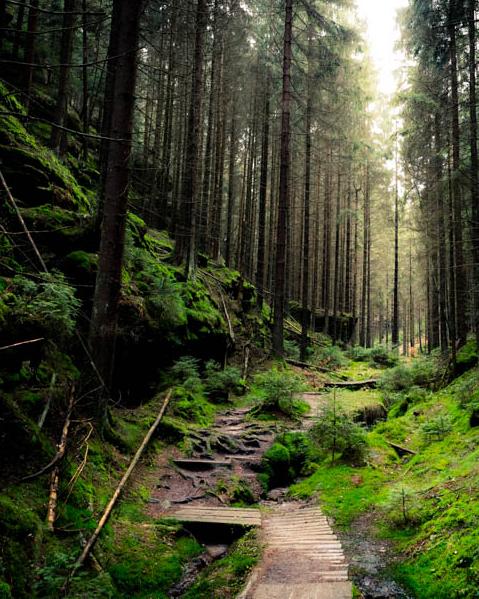
 A natural framing by the tree and leafs plus a strong artificial vignette guide the view to the center.
Conclusion
These are the most important aberrations which a photographer should heard of. One other is the diffraction blur which is caused by physical limits. The smaller the aperture the more sharpness is lost in the image. For more you can read this article about the The Perfect Aperture.
Report
My comments